Generations of kids and adults have loved stuffed animals as beloved toys because they offer solace and friendship to individuals of all ages. They come in a variety of forms, dimensions, and hues and are frequently treasured as mementos and recollections of earlier years. Nonetheless, despite their widespread appeal, certain stuffed animals might seem overly insubstantial and light, which makes them less cuddly and lifelike.
Fortunately, there are simple steps that can be taken to add weight to a stuffed animal and enhance its overall feel. One of the easiest ways to add weight is to use a material that is both heavy and pliable, such as rice, beans, or sand. By adding weight to the stuffing, the stuffed animal becomes more stable and easier to hold, making it more comfortable to snuggle up with.
Step 1: Choose Your Filling Material
A stuffed animal can feel more substantial and cuddly by having weight added to it during construction. When choosing what to use to give your stuffed animal weight, there are numerous materials to take into account.
Rice and beans are both common options that are readily available and affordable. They can be purchased at most grocery stores and are easy to work with. One advantage of using rice or beans is that they are organic and environmentally friendly. They are also soft and pliable, which can help your stuffed animal feel more natural and comfortable to hold. Additionally, rice and beans are easy to replace if your stuffed animal needs a refill.
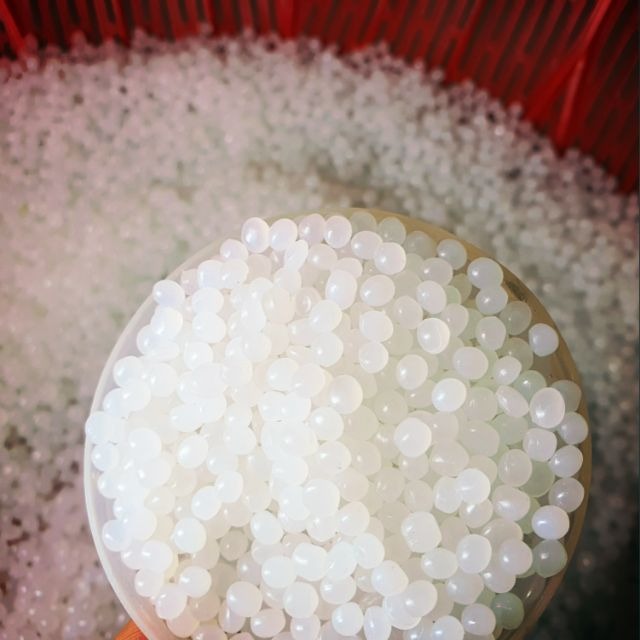
Another material to consider is small plastic pellets. These can be found at most craft stores and are a bit more expensive than rice or beans, but they offer a more consistent weight distribution. Plastic pellets are also easy to work with, and they do not break down over time like organic materials. They are often used in commercial stuffed animals because they are durable and long-lasting. If you want your stuffed animal to have a consistent weight and a longer lifespan, plastic pellets may be the best option.
When choosing a material to add weight to your stuffed animal, consider your needs and budget. Rice and beans are affordable and readily available, making them a great choice for a low-budget project. Plastic pellets are more expensive, but they offer a more consistent weight distribution and are more durable over time. Ultimately, the choice is up to you and what you want for your finished product.
Step 2: Prepare Your Filling

To ensure the durability and safety of the toy, it is crucial to prepare the stuffing properly while making stuffed animals. Take the required precautions to make sure that the filling is clear of debris, dust, and vermin whether you’re using rice, beans, or plastic pellets as a filler.
If you’re using rice or beans, you’ll need to cook them first before adding them to your stuffed animal. This is an important step because raw rice or beans can contain pests that could damage the toy over time. Once cooked, allow them to cool before using them to stuff your toy.
If you’re using plastic pellets, it’s important to wash them before use. Plastic pellets can accumulate dust and dirt during storage, which could make the toy unsanitary. Once washed, lay them out to dry completely before adding them to your stuffed animal.
By taking these simple steps, you can ensure that your stuffed animal is free from pests and dirt and that it will last for a long time.
Step 3: Access the Stuffed Animal
To add weight to your stuffed animal, you’ll need to access its inner workings. Look for a seam or opening on the toy’s underside or back. If you can’t find an opening, carefully use scissors or a seam ripper to create one.
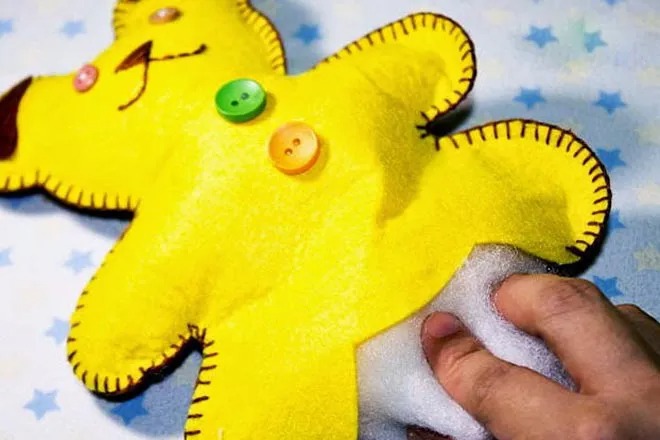
Step 4: Add the Filling
Start adding your filler after you have access to the stuffed animal’s inside. Pour your rice, beans, or plastic pellets in carefully using a funnel. Avoid overfilling the toy to avoid it bursting or becoming lumpy.
Step 5: Close the Opening
Use a needle and thread to carefully sew the opening shut after you’ve carefully added the desired quantity of filling. Choose a sturdy, resilient thread that won’t fray quickly.
Step 6: Enjoy Your Newly Weighted Stuffed Animal

You’ll be left with a stuffed animal that feels more substantial and cuddly once you’ve finished the previous processes. Give your new weighted toy more hugs and affection while you enjoy it.
In conclusion, adding weight to your stuffed animal is a quick and easy technique to increase its realism and cuddliness. It can give your toy a more pleasing sensory experience and make it feel more substantial in your arms. A stuffed animal’s resilience and lifespan can also be increased by adding weight, guaranteeing that you can enjoy it for many years.
By taking the time to follow the steps outlined above, you can easily add weight to your stuffed animal without damaging its structure or compromising its appearance. From using the right materials to distributing the weight evenly throughout the toy, each step is crucial in achieving the desired result. Additionally, you may want to experiment with different types of fillers and placement options to find the best fit for your specific toy.
The act of giving a stuffed animal weight is generally a worthy investment that can significantly increase your enjoyment of the item. This method is a simple and efficient approach to get the result you want, whether you want to make a more lifelike cuddle companion or just give your current stuffed animal a bit more weight. So why not try it and see how much cuter your stuffed animal can get?
Related post: How To Make Your Own Weighted Stuffed Animal